We have already told you how to lose weight with the help of yoga and showed you yoga exercises for spine and back, and in this article you will learn how to stand on your hands without a wall from scratch. Mastering a manual tribune or adho mukkha vrikshasana is a common goal for both experienced yogis and beginners in the world of yoga. Here you will find beginners asanas with pictures and descriptions of techniques. The handstand requires equal strength, sense of balance and mental stability, which makes it one of the most demanding, exhausting but (ultimately) satisfactory poses for victory.
We have prepared a brief, but concise guide on how to learn how to make a handstand so that you can experience that feeling when you stand, with your feet instead of your head. Standing with your feet on the ground doesn’t mean you’re pulling your buttocks or bending your back. It also has to be when you’re standing on your head. When you finally get to the position, you will feel almost weightless in this condition, because everything in this position is perfectly composed. You don’t have to try to keep your balance.
Are you ready to turn the world upside down?
Improve your strength and mobility. Your arms can support body weight, but you need strength in your upper body, arms, cortical muscles and brake strings. Dense brake cords prevent the pelvis from swinging properly, shifting pressure to the lower back and causing injury. Sloping attitude, face down and bar are good starts.
Before you can run, you must learn to walk. Folding your hands is not the only way you can learn to do this. If you can already put your hand on your head or forearms, you are halfway there.
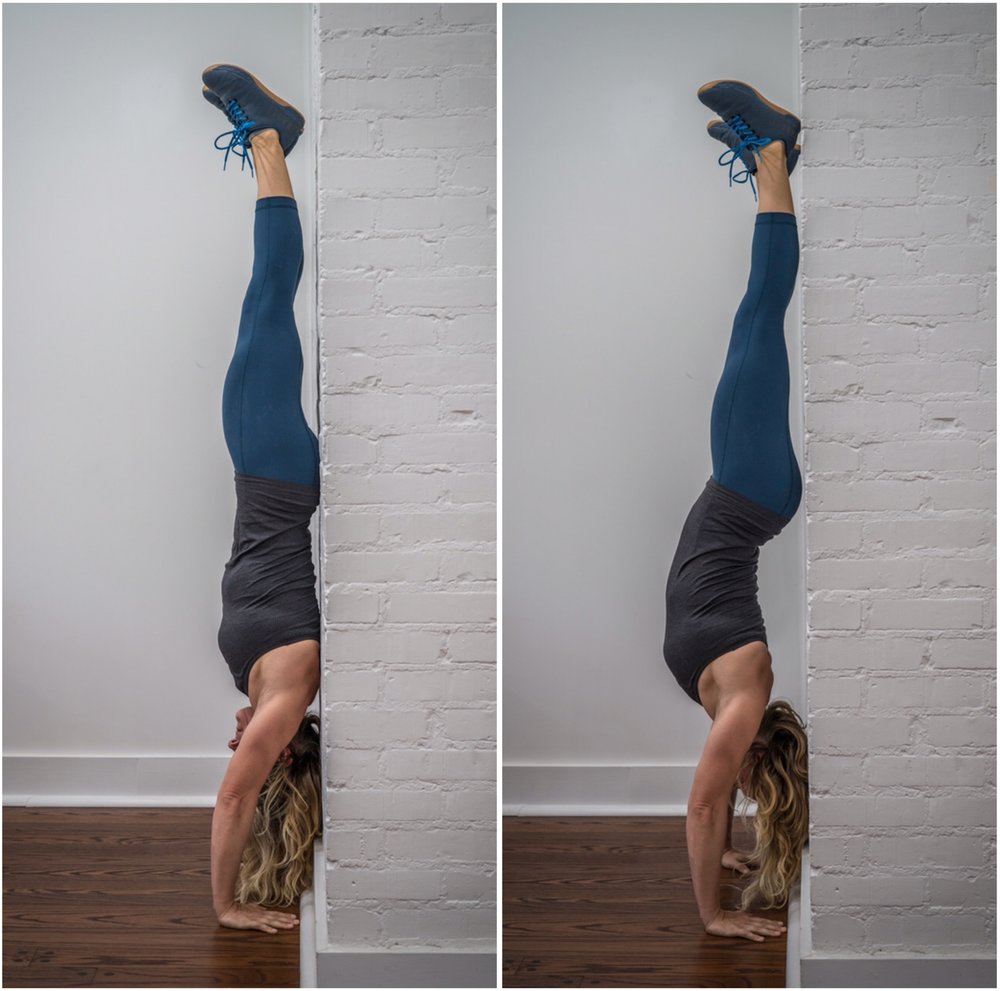
Until you are not sure, do exercises against a wall to support you, keep your hands on the width of your shoulders, fingers and elbows facing forward.
Focus on pulling the body in a straight line from head to toe, straining all muscles for stability and better control. Maintain balance by adjusting the weight of your fingers and hands.
Get rid of mental barriers
Fighting your own brain is the most difficult task. But if you can overcome your fears and doubts, you will become not only physically but also mentally stronger.
When you feel for the first time that your thighs are rising above your head, it can be very scary. Take care of yourself and leave all your expectations. Mastering a handstand can take years, decades or even life, so make sure you have fun on your way to your goal.
Focus on the Big Four:
Support yourself… Lean on your hands.
Squeeze… Squeeze your buttocks and thighs.
Look… Focus on the look between your palms.
Breathe … The most important part, so do not underestimate the strength of your breath.
As you can see, there’s nothing difficult about it. You can study at home and learn to not only stand on your hands, but also walk and run! If you only want!
5 simple steps to help you learn to stand on your hands once and for all.
If you have ever attended a yoga class where some smart yogi started pulling his hand, we are sure that you wanted to join their graceful movements. What’s the problem? Your whole body only balances on your hands.
Learning how to make a handstand may seem impossible, especially if you’re going to do it on your own. Because it can lead to many injuries. But you know what? Training your body to stand up is actually quite feasible – yes, even without hurting yourself or your ego.
If you really want to learn and improve your attitude towards your hands, you need to spend more time with them,” says Lauren Taus, a yoga teacher in Los Angeles and New York. “I offer daily training with time for raising your hands. Once I started training this way, the result was not too long.
Orli Mullin, a yoga teacher, agrees: “It shouldn’t take years to master a handstand. Exercises by the wall are the best way to start. I have successful students of all ages and statuses”.
If you want to try it all yourself, here are five preparatory steps to master this exercise.
Look at gymnast Gabby Douglas, who teaches how to put her hand on the wall:
Take the starting position. Sit on the floor facing the wall and press your legs against the wall. Attention at a distance. Then turn around and put your hands where the buttocks and legs were right in front of the wall. Hands should be shoulder wide and fingers should be extended and turned forward, not inside. In fact, you’re in your dog’s original position. From now on, practice a little and then spread all the weight on the front of your fingers or just on your fingers.
A finger-lifting workout is a great way to master the technique and prepare for manual posture as it strengthens the upper body and extends the entire spine. Common mistakes in a stick: palms twisted inwards or not turned forward, arms squeezed to the ears, bent backwards. So work on correcting these technical errors before you even get to the bookshelf.
Then start slowly raising your legs in an inclined position up against the wall behind you. Remember to leave more weight on the arms and legs that are fully supported by the wall. If your hands are strong enough to support even more weight, continue climbing the wall, activating your arms, shoulders, upper chest and compression muscles.
Practice “walking on the wall” until you feel confident, stable and strong. Make sure you do not overload your elbows – a light bend reduces the impact on the joints of your hands and also prevents them from bending. Stabilise your whole body by pulling it into your stomach and using cortical muscles. Lift the lower abdomen so your hands don’t squeeze your ears. Gradually lift your legs up the wall until your body is at a right angle and your knees are slightly bent.
Next step: get your feet off the wall. It’s best to do this by raising one foot up. Make sure your legs are slightly turned inward – this helps to keep your spine in the right position. And don’t forget your legs! Your knees can be sharp, bent or just tied up. Only when your legs are correctly positioned can you achieve results.
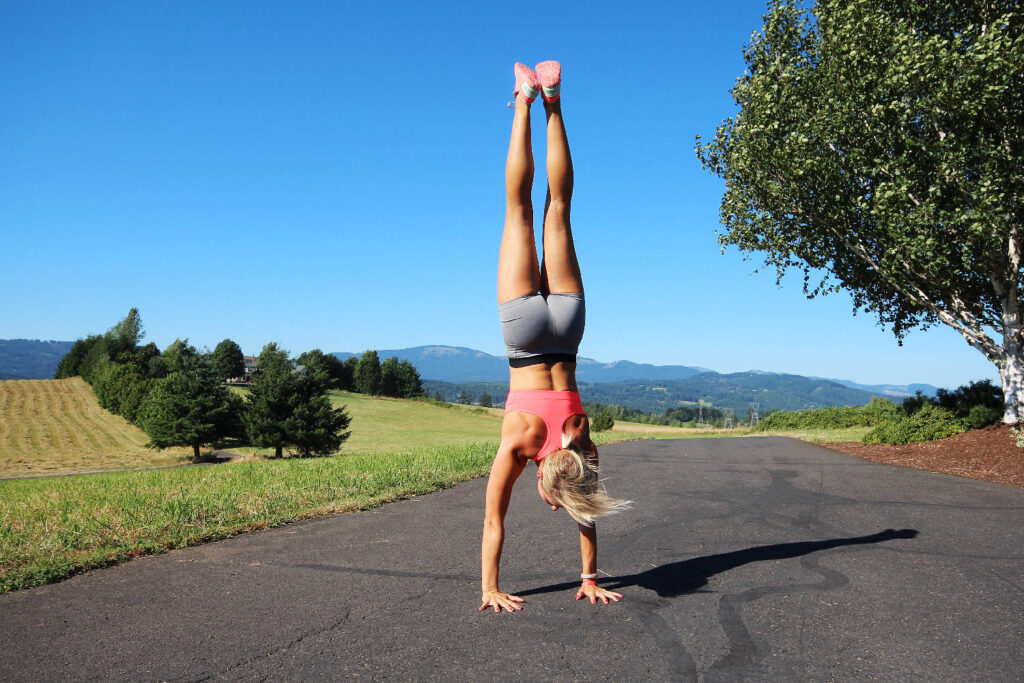
Once you feel comfortable in one foot from the wall, it’s time to move on to the next step. Pull both feet straight and up, and your toes should be against the wall. You can save this posture for more exercises or, when you are ready, gently pull away from the wall. When you do this the first time, call someone to support you. Also make sure there’s no furniture in the room, just in case. If you still feel unstable, just go back to the wall.
Remember that lifting requires strong arms, shoulders, abs and back. You will use biceps, triceps and deltoid muscle to train successfully and hold your hand. It’s also important to place your hands properly (arms across shoulders, fingers thinned out, turned forward, not inwards), pull them out, put your hands away, lift and strain your stomach (to prevent back injuries), turn your legs and pay attention to them.
This is why building strength and previous practice of correct body posture is so important. Yes, it will take time and patience, but remember that this is a journey that will definitely strengthen your body and mind. How long will it take? Well, you know, it’s not fast enough and you can’t become a super yogi in a short time, but you can practice at home where no one will interfere and you will do it for your own pleasure.